Guide · Your recordings
How to add your logo and brand colours to every video
Step by step, save your logo and brand colours, add them to the cards, captions and corner of a polished video, then save the look as a style for every video after it.
3 min read · Updated
Feature used in this guide: Brand kit and saved styles — what it does, its limits and how credits work.
This guide sets up your brand once and uses it on every polished video of your recordings: your logo in the corner and on the cards, your colours in the captions and scenes, and a saved style so the next video looks the same in one click.
You’ll need: a logo file (PNG, JPEG or WebP, up to 5 MB — a PNG with a see-through background looks best), your brand colours, and an edited recording in the Video Editor. Setting up the brand is free; the polished video uses credits.
Step 1: Save your logo
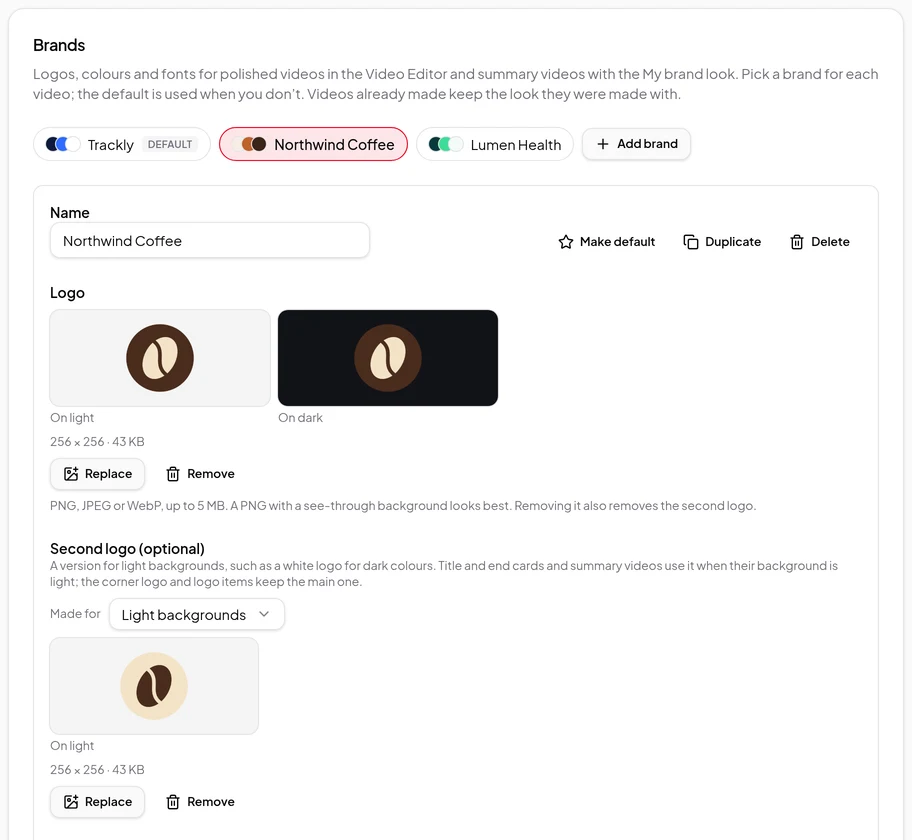
Open Settings → Brands and click Create a brand (or pick the brand you want). Under Logo, click Upload logo and choose the file. The card shows it On light and On dark, so you can check it reads on both. If it disappears on one, upload a version with a see-through background or a different colour. You can also add a Second logo (optional) — for example a white version — and set Made for to dark or light backgrounds; title and end cards use it when their background matches.
Step 2: Save your colours
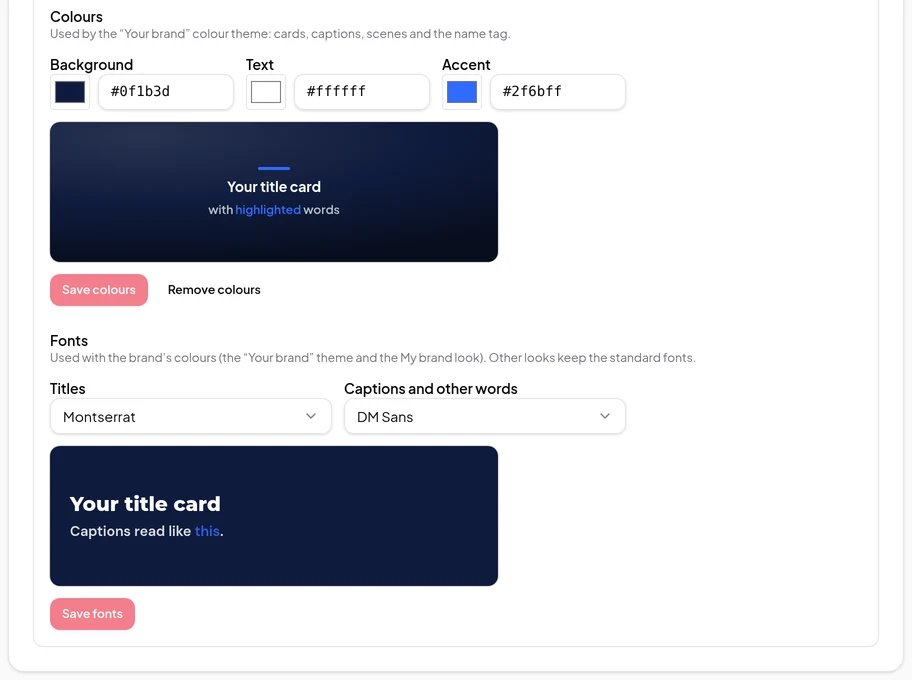
Under Colours, set three colours:
- Background — cards and scene backgrounds.
- Text — words on those backgrounds.
- Accent — highlights, such as the spoken word in captions.
Type them like #1f6feb or pick them. The sample title card and caption show how they look together. Click Save colours.
Want your own fonts too? Under Fonts, pick one for Titles and one for Captions and other words, and click Save fonts. They’re used together with the brand’s colours.
Step 3: Apply your brand to a recording
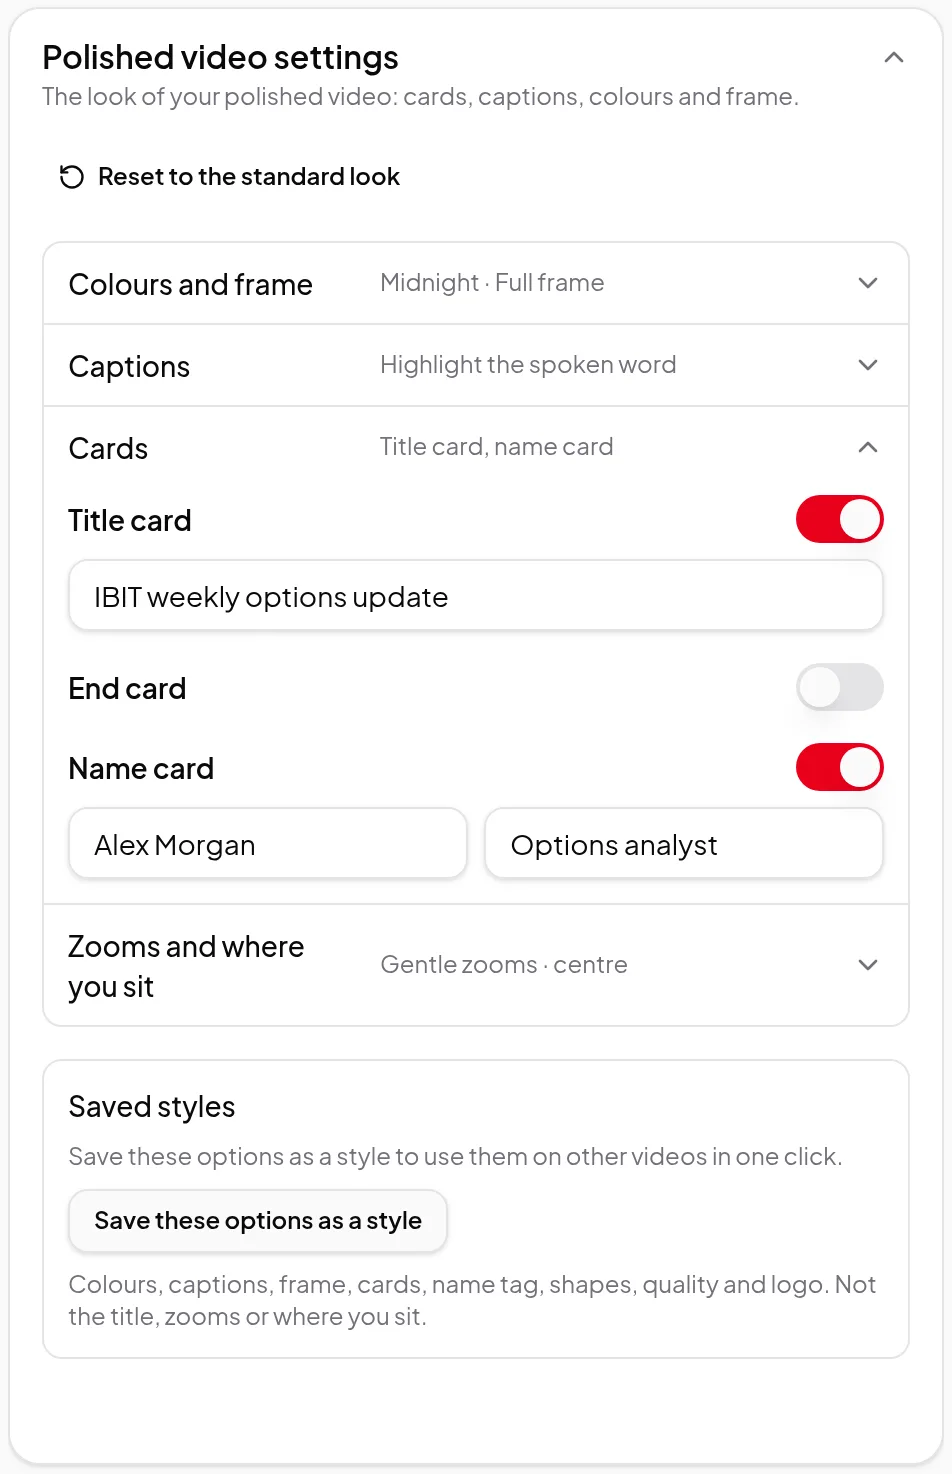
Open an edited recording and go to Polished video settings:
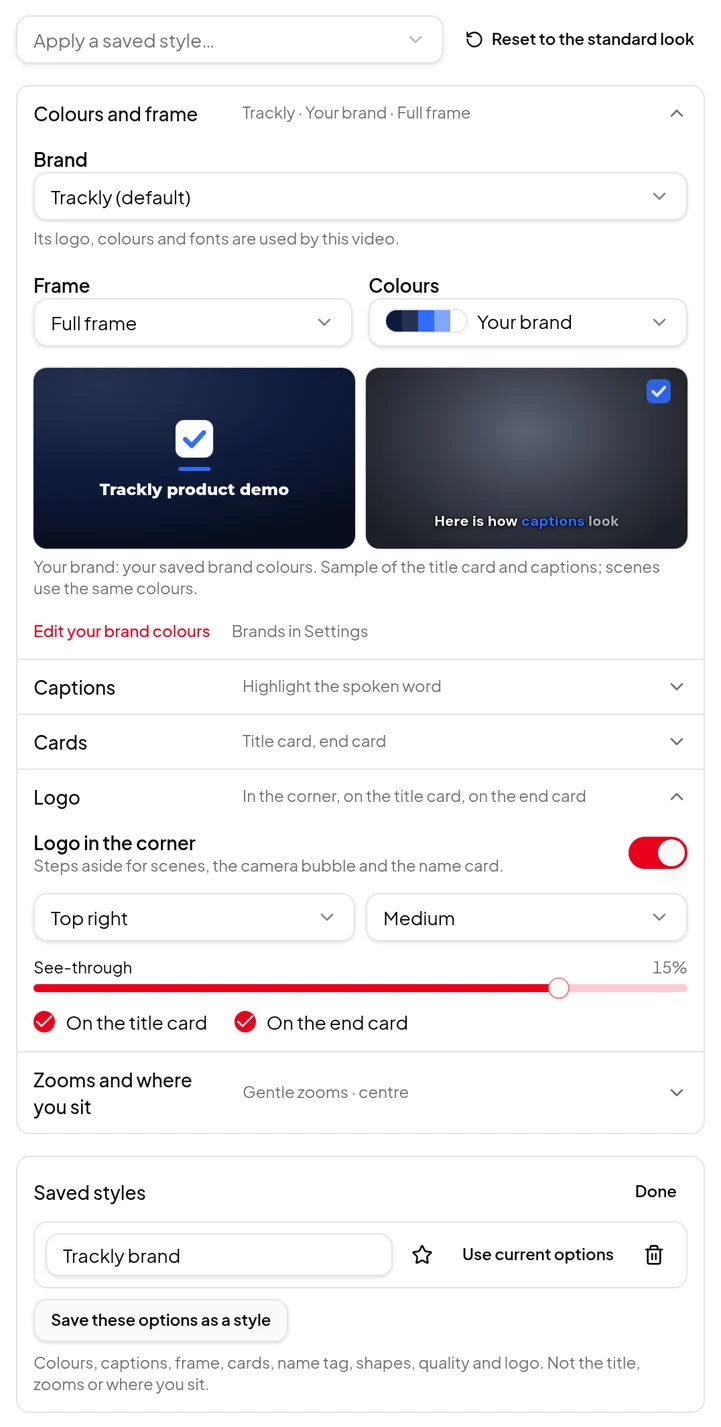
- Open Colours and frame. With more than one brand, pick the one this video uses under Brand. Then pick Your brand as the colours. Need a tweak? Edit your brand colours changes them right there.
- Open Logo and switch on Logo in the corner. Choose the corner, the size and how see-through it is.
- Tick On the title card and On the end card to show the logo there too.
- Open Cards and switch on the Title card, End card and Name card you want, with their text.
Step 4: Add text and a logo at the right moments
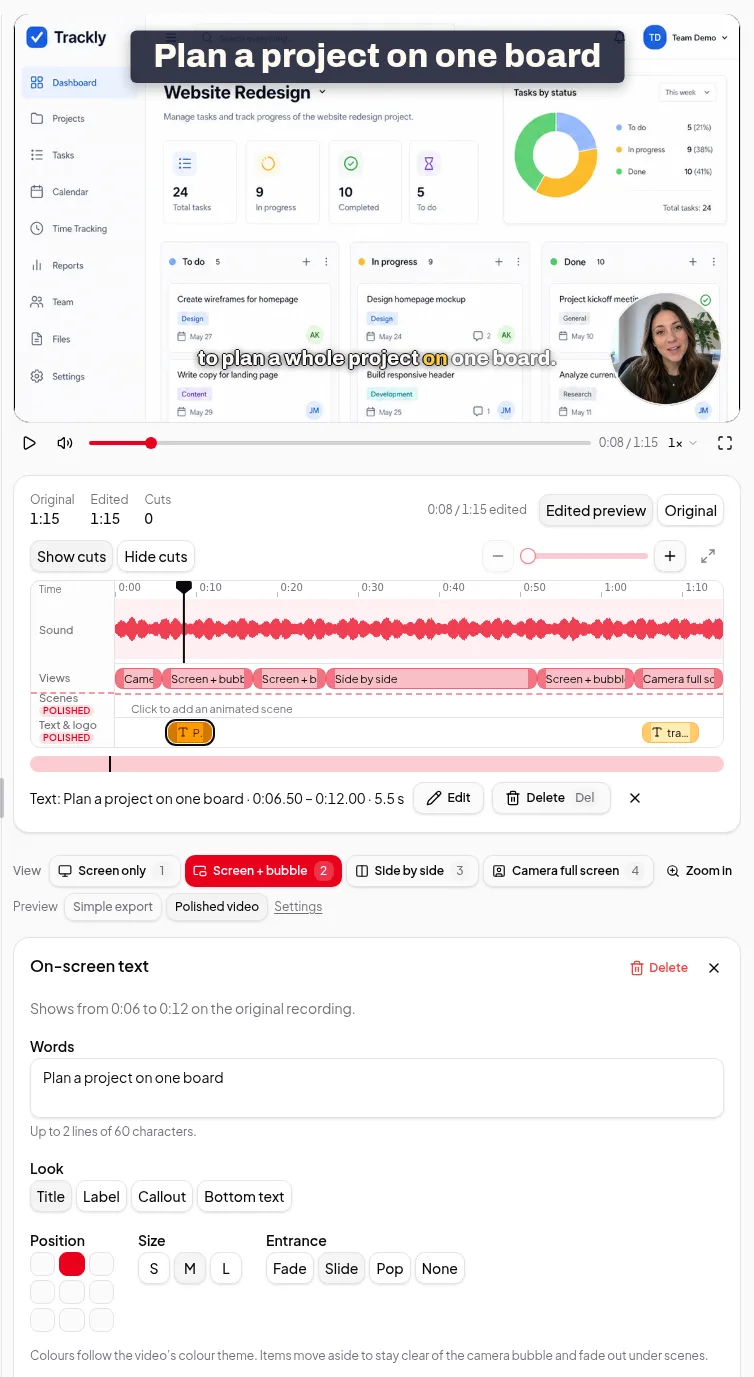
For a title or label at a particular moment, move the playhead there and click Add text (or Add logo) to put an item on the Text & logo row. Click it to type the words (up to 2 lines of 60 characters) and choose the look — Title, Label, Callout or Bottom text — the position, the size and the entrance. Drag it to move it, or drag its edges to change how long it shows. Text uses your brand colours. These items also show in cloud renders; the free export on your computer leaves them out.
Step 5: Check the preview
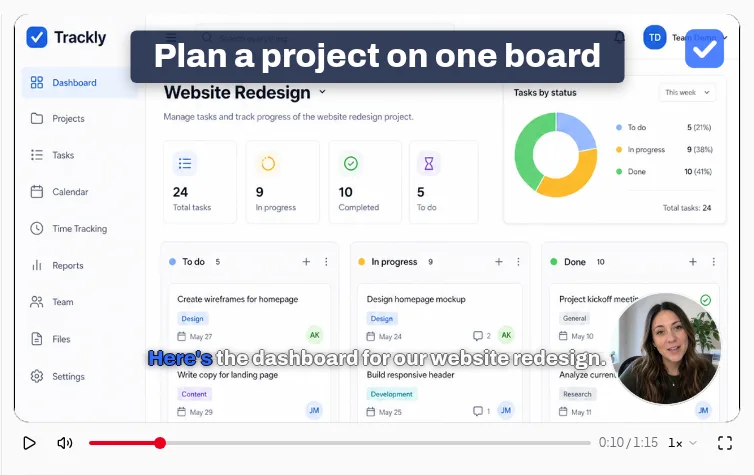
Switch the preview under the player to Polished video and play it. The corner logo, cards, captions and text show as they’ll appear. The logo steps aside for scenes, the camera bubble and the name card.
Step 6: Save the look as a style
Under Saved styles, click Save these options as a style and name it — “Brand”, for example. Click Manage and star it to make it the default for new recordings.
On your next recording, the starred style is already applied. For any other recording, choose it from Apply a saved style…. A style keeps colours, captions, frame, cards, name tag, shapes, quality and logo; the title, zooms and where you sit stay with each video.
Step 7: Make the polished video
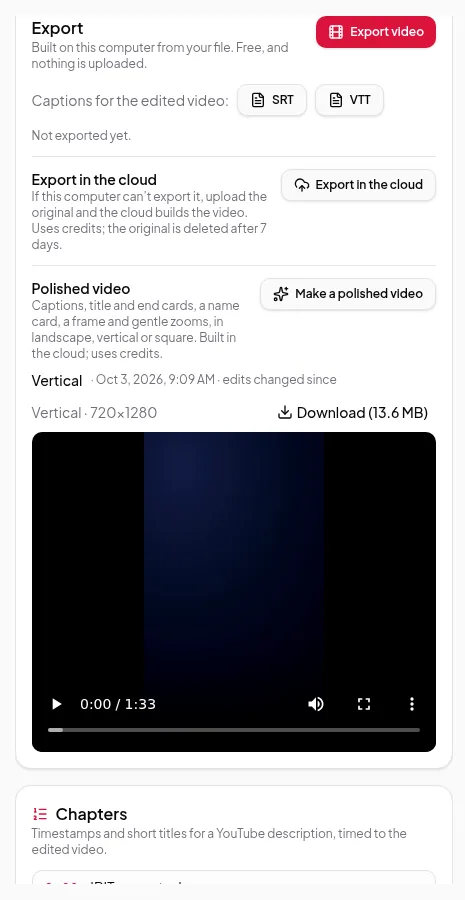
In the Export section, choose Polished video, pick the shapes and quality, check the price on the Start button and start. See export your finished video.
Tips
- Keep the corner logo small and see-through. It should sign the video, not compete with the screen.
- Pick a strong accent. Caption highlights use it, so it needs to stand out against your background colour.
- Changing your brand later is safe. Videos already made keep the look they were made with.
- Summary videos made from links or text use your colours and corner logo with Look → My brand when you render in Studio or set up a Quick Render. Cards, text items and saved styles are for polished videos of your recordings.