Guide · Your recordings
How to auto-zoom and frame a screen recording
Step by step, let the AI director suggest zooms and camera views for a product demo or tutorial, frame the important parts of the screen yourself, and export the result.
3 min read · Updated
Feature used in this guide: Camera views and auto zoom — what it does, its limits and how credits work.
A full-screen recording of an app is hard to read on a phone, and a talking head in the corner for ten minutes gets dull. This guide frames a product demo or tutorial so viewers always see what matters: zooms on the part of the screen you’re working in, and your camera when you speak to them. You can let the AI director suggest it, set it by hand, or both.
You’ll need: a recording open in the Video Editor. For the camera views, record a Screen + camera take with the built-in recorder; zooms work on any recording. Setting views by hand is free; Direct my video uses credits.
Step 1: Edit the words first
Cut the mistakes, pauses and retakes before you frame the video. Views follow your cuts, but a finished edit makes it easier to judge where each shot belongs. See edit a recording by deleting words.
Step 2: Ask the AI director for shots
Open AI director. Under Plan for, pick the shape you’re making — Landscape 16:9 for YouTube or a help centre, Vertical 9:16 for Shorts and Reels, Square 1:1 for feeds. Make sure the recording’s video is open on the page, so the director can see what happens on screen. Check the estimate next to the button, then click Direct my video.
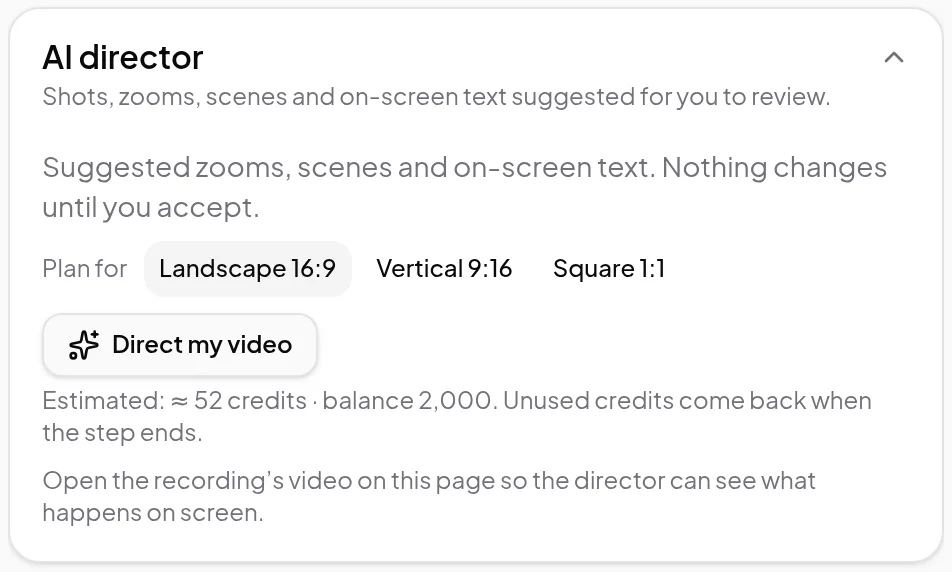
The director reads what you say and what happens on screen and suggests shots, zooms, scenes and on-screen text. It keeps going if you close the tab.
Step 3: Review the suggestions
Go through the list. Each suggestion shows when it plays and what it does:
- Click Accept to add it, or Reject to drop it.
- Change a text suggestion’s words before you accept it.
- Click Accept all to take every suggestion that doesn’t clash with something you placed yourself.
Play the edited preview to check the rhythm. If you want a different plan, Direct again replaces only the suggestions you haven’t reviewed yet.
Step 4: Switch views by hand
Under the player, the View bar has Screen only, Screen + bubble, Side by side and Camera full screen. Play the video and click a view — or press 1, 2, 3 or 4 while the player or timeline has focus — and the new view starts at the playhead.
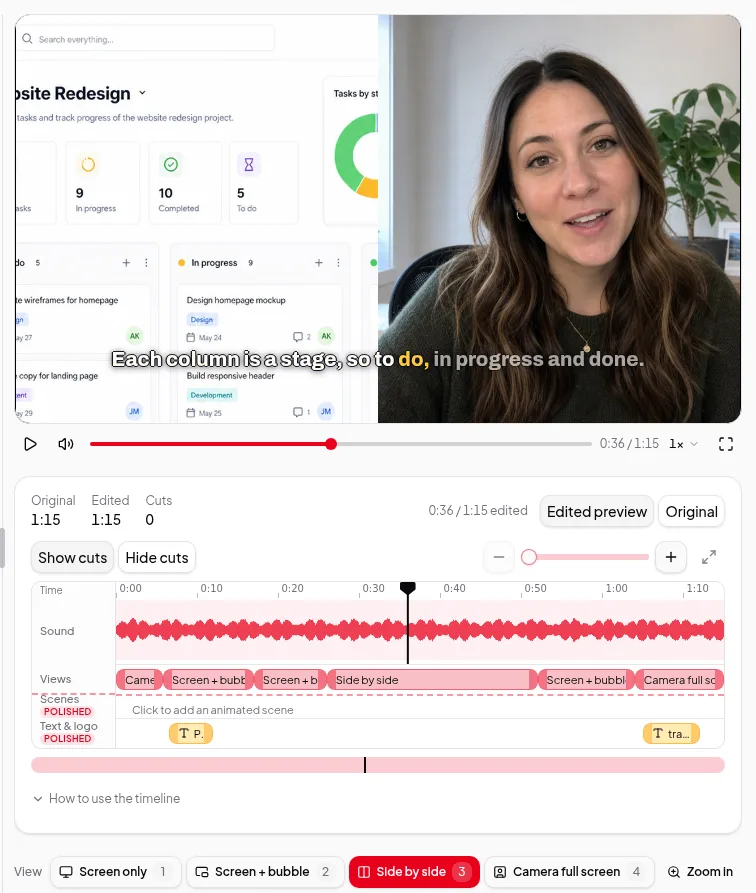
A pattern that works for demos:
- Camera full screen for the first sentence, so viewers meet you.
- Screen + bubble while you work in the app.
- Side by side when you explain something rather than click through it.
- Screen only for a fast walkthrough where your face would distract.
To set a view for an exact stretch, select the words in the transcript and pick a view from the View menu.
Step 5: Zoom in on what matters
Move the playhead to where you open a menu, fill in a field or point at a number, and click Zoom in. Drag the box over what to show, resize it from its corner and click Done. The zoom lasts a few seconds from the playhead.
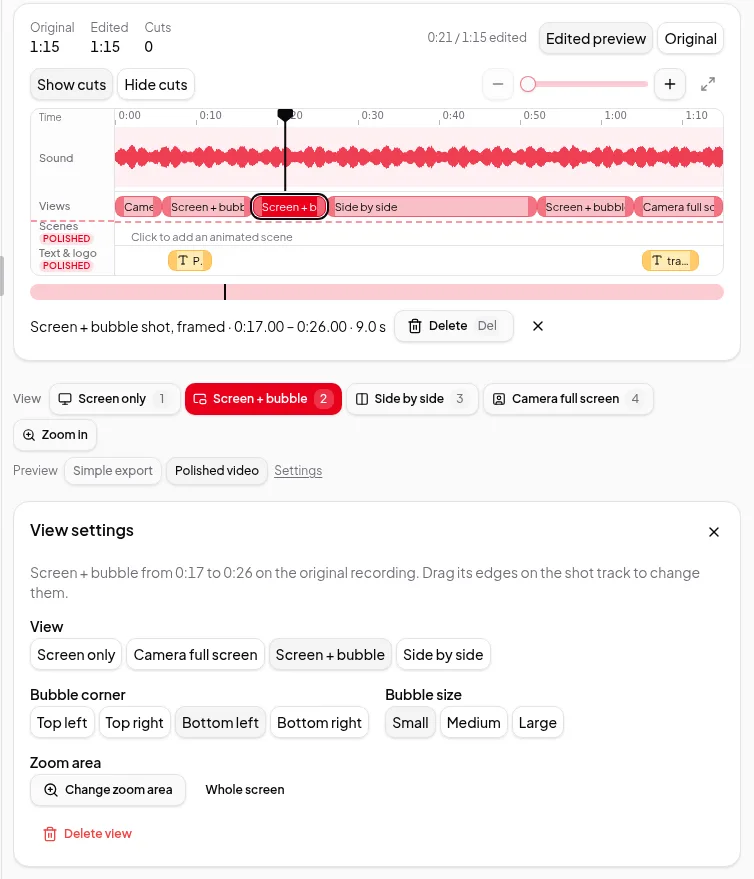
To change a view or zoom later, click its block on the Views row. In View settings you can switch the view, move the bubble to another corner, change its size, Change zoom area, choose Whole screen to take the zoom away, or Delete view. Drag a block’s edges to change when it starts and ends.
Step 6: Preview and export
Under the player, Simple export previews the free export and Polished video previews the polished one. Views and zooms are in both. Then:
- Export on this computer for free, with your views and zooms.
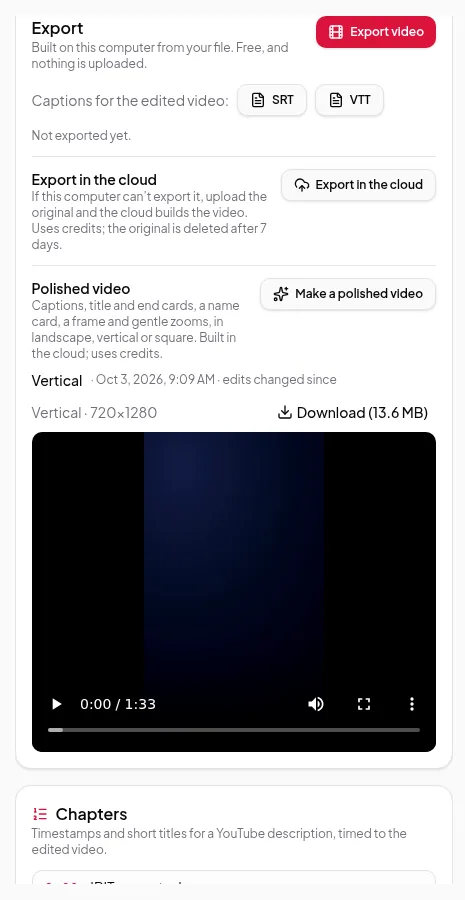
- Make a polished video to add the director’s scenes and text, captions, cards and your brand, in the shape you planned for.
See export your finished video.
Tips
- Zoom on the action, not the decoration. A zoom works best on the part of the screen that changes — a dialog opening, a value updating.
- Plan for the shape you’ll post. A vertical video needs tighter zooms than a landscape one, so pick it in Plan for before directing.
- Leave room between zooms. A few seconds of the whole screen between zooms helps viewers see where they are.
- Record at a normal window size. Very large screens make text tiny until you zoom.