Guide · Summary videos
How to make Shorts and Reels from a long video
Turn a long YouTube video or your own recording into vertical 9:16 videos for YouTube Shorts, Instagram Reels and TikTok, with captions and layouts made for phones.
3 min read · Updated
Feature used in this guide: Vertical, square and landscape formats — what it does, its limits and how credits work.
Short vertical videos are where new viewers find you. But a long video doesn’t become a good Short by cropping it. It needs a tighter message, captions sized for a phone, and a layout made for 9:16. This guide shows two ways to get there with Vidonto:
- From a YouTube video or article — make a narrated vertical summary (Steps 1–6).
- From your own recording — turn your edited footage into a vertical polished video (Steps 7–9).
Part 1: A vertical summary of a long video
Step 1: Decide what each Short is about
One Short, one idea. Before you open the app, decide on the angle: the single most surprising finding, the three tips, the answer to one question. If a long video has three good ideas, plan three Shorts.
Step 2: Open Quick Render and paste the link
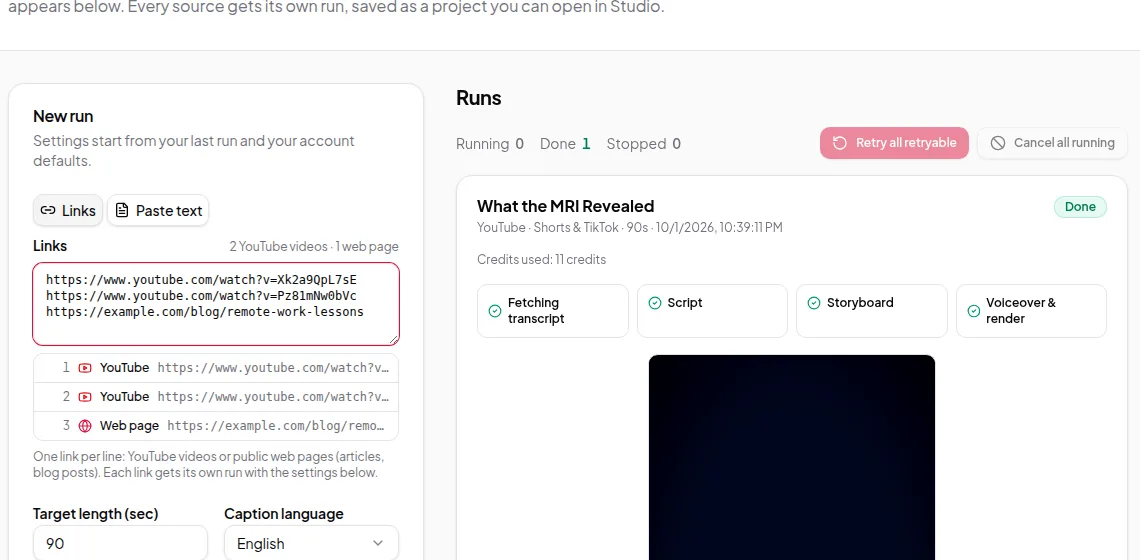
Open Quick Render and paste the YouTube link in Links. You can add several different videos, one per line, and each becomes its own Short.
Step 3: Choose vertical settings
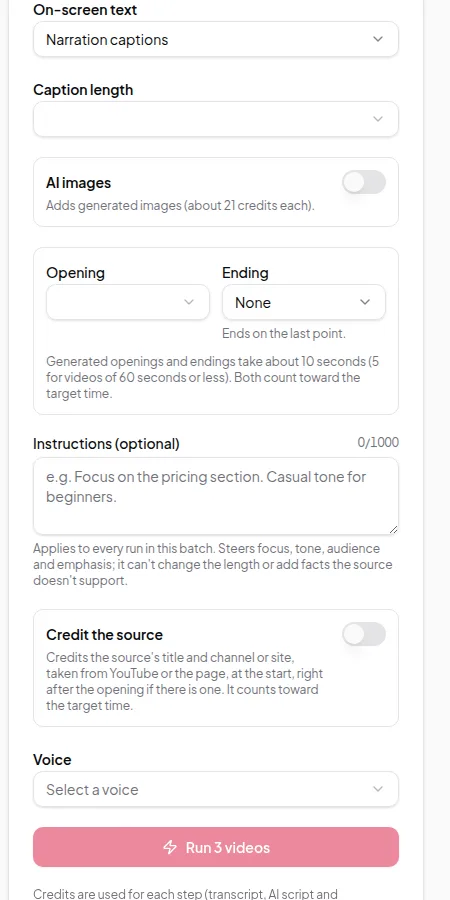
- Target length: 30–60 seconds. Shorts can be up to three minutes, but shorter videos are more likely to be watched to the end.
- Video size: Shorts & TikTok (9:16, 720 × 1280). This works for YouTube Shorts, Instagram Reels, TikTok and Stories.
- On-screen text: Narration captions, so viewers with the sound off can follow every word.
- Caption length: Short — a few words at a time is easiest to read on a phone.
- Opening: a short hook such as “Coming up” helps in the first seconds. Openings take about 5 seconds on videos of 40 seconds or less.
Step 4: Steer each Short with instructions
The Instructions box (up to 1,000 characters) applies to every link in the run. For angles that differ per video, run them separately. Examples:
- “Focus only on the part about sleep and memory. Start with the most surprising fact.”
- “Make it a list of three tips. No introduction.”
Step 5: Run and review
Check the estimate and click Run. When the runs finish, play each one in the list. If a Short needs different wording, click Open in Studio, edit the script or storyboard, and render again.
Step 6: Make other shapes from the same source
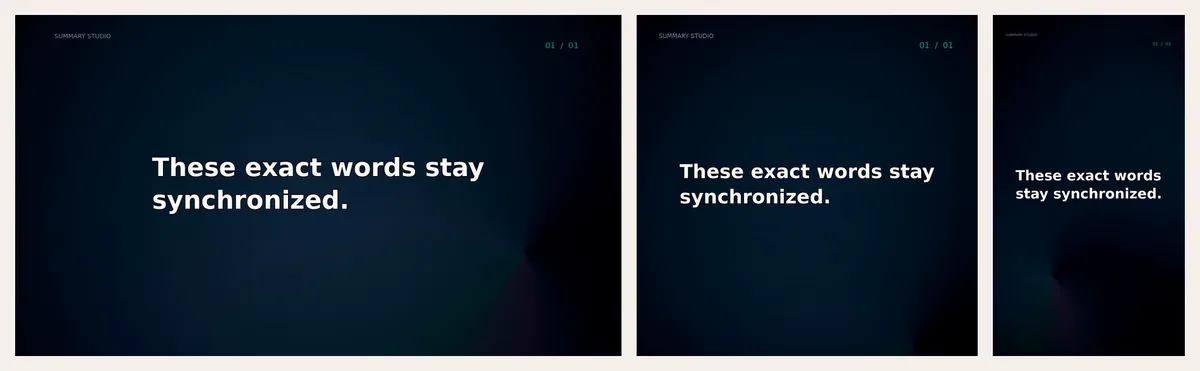
The format is part of the plan, so to get both a vertical Short and a landscape version, run the same link twice with different Video size settings. Each layout is designed for its shape, rather than cropped.
Part 2: A vertical video from your own recording
If the long video is your own — a podcast, a webinar, a talking-head video — use the Video Editor to keep your real voice and face.
Step 7: Edit the recording down
Open Video Editor → New video and pick the file. Once the transcript is ready, delete everything that isn’t part of this Short: select words and choose Remove. You’re left with the 30–60 seconds that make the point. The deleting words guide covers this in detail.
Step 8: Make a vertical polished video
In the Export panel, click Make a polished video. In the dialog:
- Under Shapes, pick Vertical (9:16). You can add Square and Landscape too; each shape is made from the same edit and charged separately.
- Choose a Frame and Colours.
- Leave Captions on and choose a style such as Highlight the spoken word.
- Add a Title card with the hook of the Short.
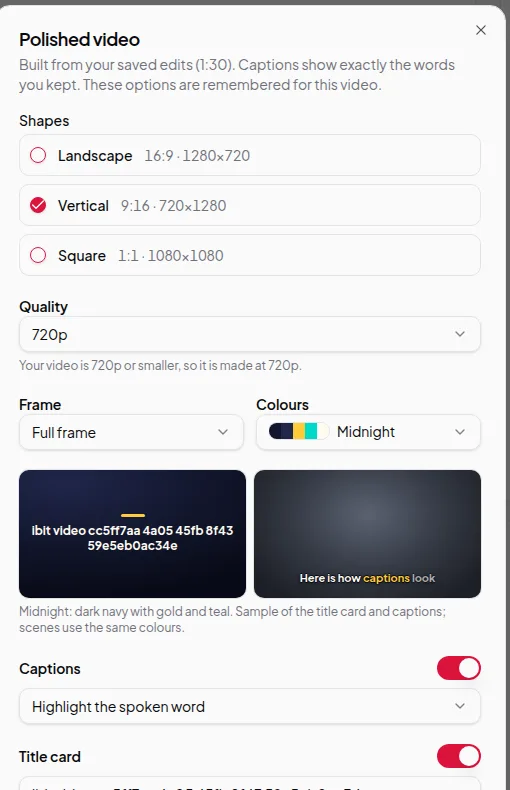
The full credit cost is shown before you confirm. A failed render costs nothing.
Step 9: Download and post
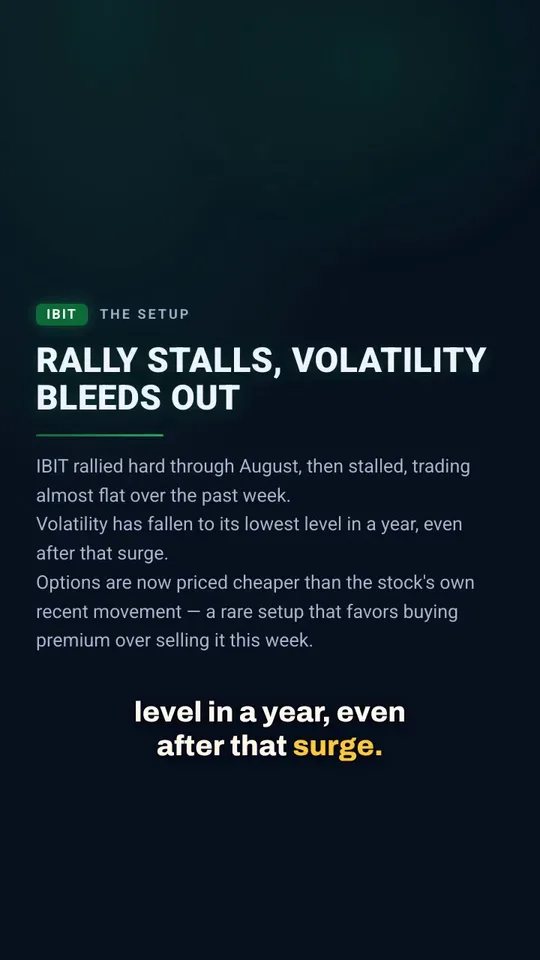
When it’s ready, the vertical video appears in the Export panel with a Download button. Captions sit low in the frame where phone viewers expect them, and any scenes you added are laid out for the tall screen.
Posting tips for Shorts, Reels and TikTok
- Hook in the first two seconds. Put the most interesting line first, in the script or the title card.
- Captions on. Most short-form viewing starts muted.
- Write a description with keywords. In the Studio, Share & post gives you a generated description to edit and copy.
- Link back. Point viewers to the full video in the description or a pinned comment.
- Post consistently. Several Shorts from one long video can be scheduled over a week.