Guide · Summary videos
How to use your own footage in a summary video
Pick recordings you keep in the cloud, let the storyboard place clips where they match the narration, then check, trim and preview each clip before you render.
3 min read · Updated
Feature used in this guide: Your own footage in summary videos — what it does, its limits and how credits work.
A summary video about your own product or course can show the real thing: a few seconds of your demo, your webinar or your talk on the frames where the narration talks about it. This guide walks through it in the Studio. Quick Render has the same Add clips from your recordings picker in its settings, and its runs place clips the same way, without the review step.
Step 1: Keep the recordings in the cloud
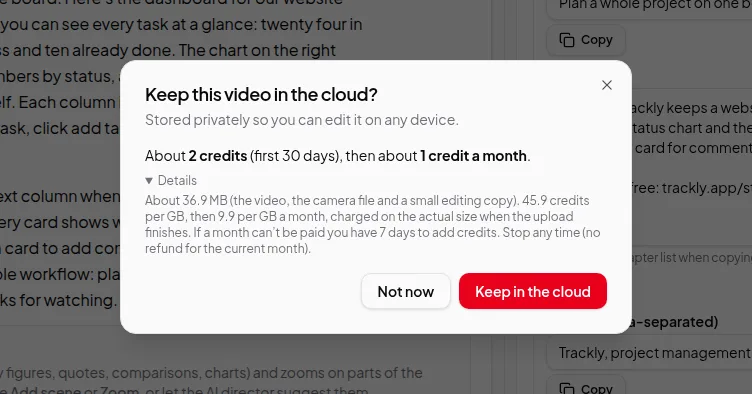
Clips come only from recordings that are transcribed and kept in the cloud. Open each recording you want to use in the Video Editor, make sure its transcript is ready, and click Keep in the cloud… in the Keep in the cloud card. The price is shown before anything is stored.
If the video is already on YouTube, TikTok, X or Facebook, you can add it from a link instead; it’s kept in the cloud and transcribed in one go.
Tip: clean up the recording first. Cuts you make in the Video Editor are skipped when the clip is rendered.
Step 2: Write and approve the script
In the Studio, start a project from a YouTube link, a web page, a file, your own script or several sources, and approve the script as usual. See make your first video if you’re new to the Studio.
Step 3: Pick your footage
In the AI Storyboard step, find Add clips from your recordings and tick up to 5 recordings. Recordings that can’t be used are greyed out with the reason, such as “Not kept in the cloud”. Picking footage is free; the note below the list reminds you that clips use no AI image credits.
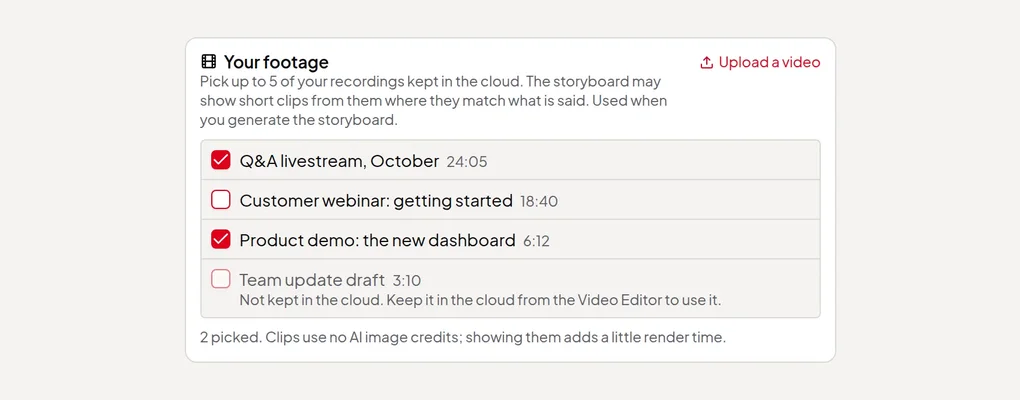
Then click Generate Storyboard. The price is shown first.
Step 4: Check each clip
Open the Storyboard tab. Frames where the director chose Clip from your footage show a clip box under Director:
- the recording and the clip’s start time and length, next to the length of the frame;
- the words spoken in the clip;
- a Moment list to jump to another sentence in the recording;
- Start and End buttons that move either edge one sentence earlier or later;
- Preview, to watch the clip;
- Play the clip’s sound under the narration, off by default.
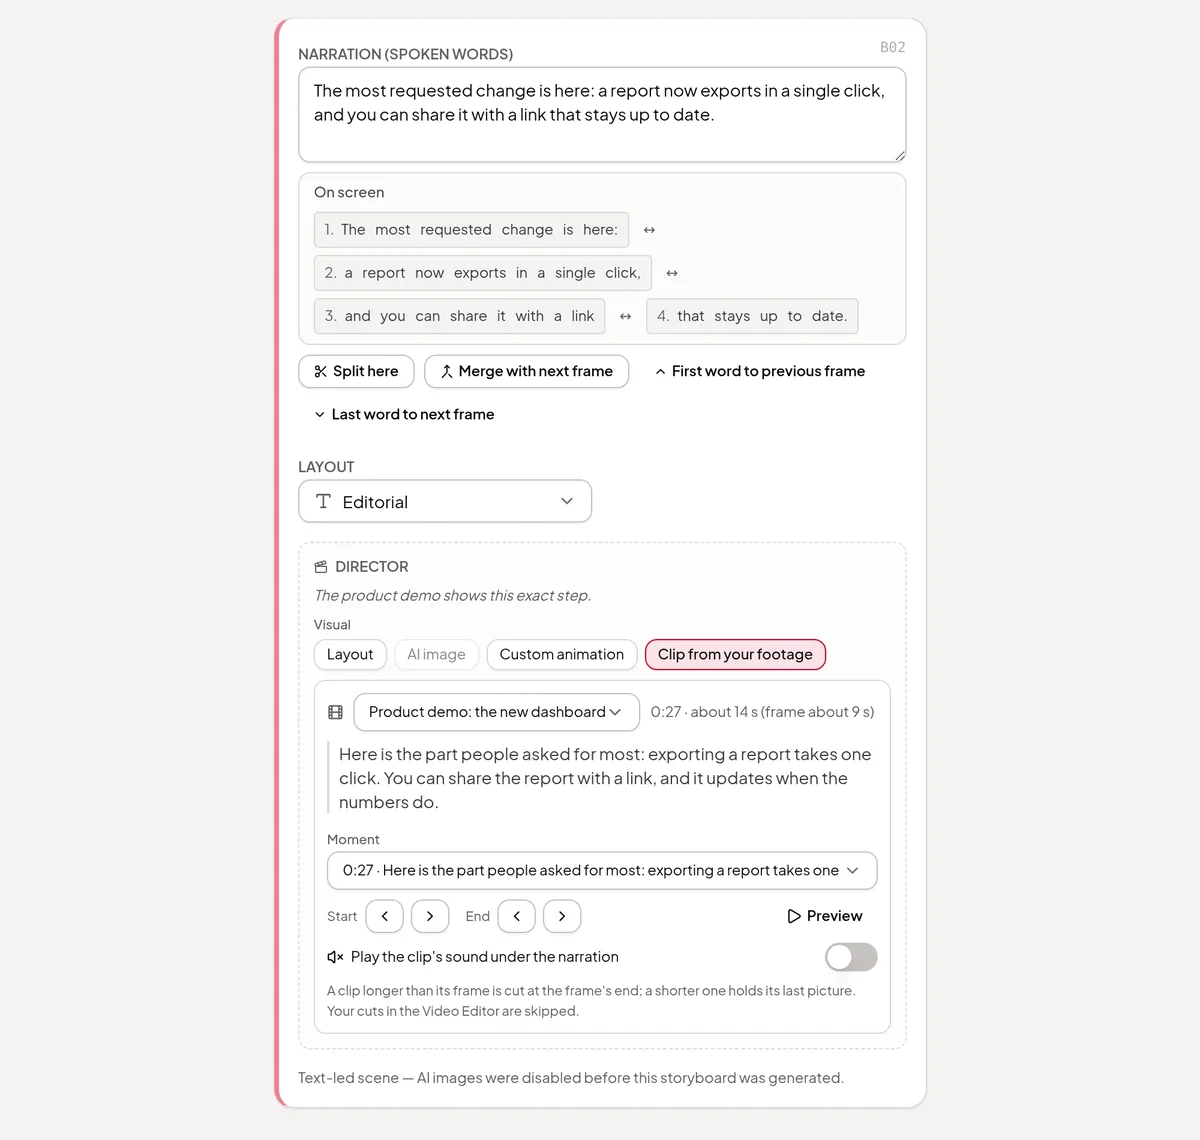
A clip longer than its frame is cut where the frame ends, and a shorter one holds its last picture, so aim for a moment about as long as the frame’s narration.
Step 5: Add, swap or remove clips
- To show a clip on another frame, click Clip from your footage in that frame’s Visual choices and pick the moment.
- To drop a clip, pick Layout, AI image or Custom animation instead.
- Opening and closing frames, charts, lists and animated scenes don’t offer clips, and there’s a limit of about one clip every 12 seconds of narration (at least 3).
Storyboard edits don’t use credits. When you’re happy, approve the storyboard.
Step 6: Render and check the result
Start the final render as usual. If a clip can’t be used when the video is made — for example, the recording was removed from the cloud — that frame shows its standard layout instead, the render still finishes, and the result tells you which clips were left out and why.
Related: the storyboard editor and edit a storyboard before rendering.